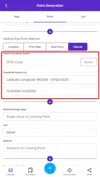
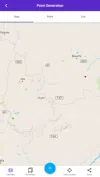
When the standing point is entered in the BlueGIS software, the coordinate of the point looked at can be calculated according to the slope and distance values.
Other Documents
10.03.2020
10.03.2020
3-Upload Multiple Spatial Files
10.03.2020
10.03.2020
5-Attribute Table and Features
10.03.20206-Feature Attribute Table - Operations
10.03.2020
10.03.2020
10.03.2020
10.03.2020
10.03.2020
10.03.2020
10.03.2020
10.03.2020
10.03.2020
10.03.2020
10.03.2020
10.03.2020
10.03.2020
10.03.2020
10.03.2020
10.03.2020
10.03.2020
10.03.2020
25-Re-Adding Previously Added Layers
10.03.202026-Filtering With Overpass API
10.03.2020
10.03.2020
10.03.2020
10.03.2020
10.03.2020
10.03.2020
10.03.2020
10.03.2020
34-Point Creation Using Slope And Distance
10.03.202035-Bearing And Length Calculation
10.03.2020
10.03.2020
10.03.2020
10.03.2020
10.03.2020
10.03.2020
41-Creating Point By Clicking The Map
10.03.2020
10.03.2020
10.03.2020
44-Listing System Files And Adding To Map
10.03.2020
10.03.2020
46-Displaying Shared Files And People
10.03.202049-Add, Edit, Delete Geometry in Real-Time
10.03.202050-Sending Back System Layers Changes
10.03.2020
10.03.2020
52-Listing Maps Shared With Everyone
10.03.202053-Displaying Available GISMoney
10.03.2020
10.03.2020
10.03.2020


Related Documents